Wednesday, June 30, 2010
Wordless Wednesday- Great Legs
Labels:
wine,
Wordless Wednesday
Thursday, June 24, 2010
Wednesday, June 23, 2010
Wordless Wednesday- Rock Cairn
Labels:
Wordless Wednesday
Tuesday, June 22, 2010
Origami Folded Cups
I saw these cups on MarthaStewart.com and had to share them with everyone. They are such cute little cups for a party, I think they are worth the effort. I could even see these done with themed paper.
A few easy folds is all it takes to turn plain paper into cheery cups for servings of fresh fruit salad and more. Use sheets of glassine and parchment paper for moist food, like these balls of honeydew melon, cantaloupe, and watermelon. You could also serve assorted nuts, cookies, popcorn, and other treats in the colorful paper containers.
For each cup, start with one sheet each of glassine and parchment paper. Cut whichever sheet will form the inside of the cup to 9 1/2 inches square; cut the other to 10 inches square. Center the small sheet on top of the large sheet, and attach in center with a piece of double-sided tape.

Fold square in half to form a triangle.

Fold bottom-right corner to left side.

Fold bottom-left corner to right side.

Fold front top points over front of cup, then rear top points behind back. To complete, hold top of cup open with one hand, then gently press bottom seam up at the center with other hand.
Labels:
craft,
Martha Stewart,
paper cups
Monday, June 21, 2010
Girly Summer Swap Package Arrives!
Hooray
My package from Shanna arrived and look at all the wonderful things I was given.
A great roll-up beach blanket- This is perfect because my other one was getting taken over by the kids.
Country Time Strawberry Lemonade- YUM
Adorable plastic glasses with pictures of Strawberry Lemon- probably a grapefruit but I like Strawberry Lemon better.
Cute Summer time napkins- Perfect for all those summertime BBQ's
A blow-up beach ball- The kids will have fun with this one!
For those just tuning in, this was a Girly Summer Swap hosted by April at dot...dot...dot
We were paired up with someone and switched summertime gift packages.
Such fun
Hope Shanna liked hers. :)
Labels:
gift,
summertime
Sunday, June 20, 2010
It's a Colorful Life Challenge- Brown
This week's color is BROWN. I don't remember when I took this photo of a tree (or why) but it sure came in handy this week. :)
Every week (or so), I will present a new color in my blog and it will be your job to contribute a photo of that color. I will collect all the photos and put them together in a collage. And at the end of the summer, we will have a very colorful piece of art! At the end of the challenge,
I will also pick 1 participant to win a print of the art piece, mounted on 1 inch thick wood frame.
This challenge is hosted by Creative Flair. Be sure to follow to get the update as we go through the colors this summer.
Photo by Hubby
Frauke Avent

Just added this one. Sunlight coming through the window produced a great shadow of wine legs.
Labels:
brown,
It's a colorful life,
photo
Friday, June 18, 2010
Where Bloggers Create
No, it's not that attractive or interesting. This couch has been the place where I would sit and write my blogs. It was comfortable, that's for sure. But, it is no longer. It is packed up with the rest of all my things as we move to our new house. And I am so excited!
I will FINALLY get to have my own studio for all my creations and a place for a desk. In this studio, I will have my easel for my paintings, an island table for ongoing projects, a desk for my beloved laptop and STORAGE. Oh, how I have dreamed of a place to keep all of my art things neat and tidy. And I'm sure my family will appreciate not having my artwork all over the house.
I have even decided on the look of the room: Burnt orange walls with lime green wavy lines circling the ceiling line and the word CREATE spelled out on individual canvases.
I Can't Wait!!!
Labels:
bloggers create,
Creative Flair Art
Thursday, June 17, 2010
Friends
4 boys being boys. They climbed to the top of the hill, slid all the way down on their butts. You can only imagine how dirty they were.
4 Boys having a great time...just being boys.
Wednesday, June 16, 2010
Wordless Wednesday- 1991 Heitz Cellar Cabernet
Labels:
Heitz cellars,
wine,
Wordless Wednesday
Monday, June 14, 2010
Spiced Popcorn
This original recipe post is from a favorite blog of mine, Food, Wine, & Pod Podge. I highly suggest giving her a visit.
Start by popping 1/2 cup popcorn in the way that you like. We sometimes do air popped popcorn, but for this recipe, we decided to use Alton Brown's Perfect Popcornpreparation method.
We used 1/2 cup popcorn with 2 tbs peanut oil.
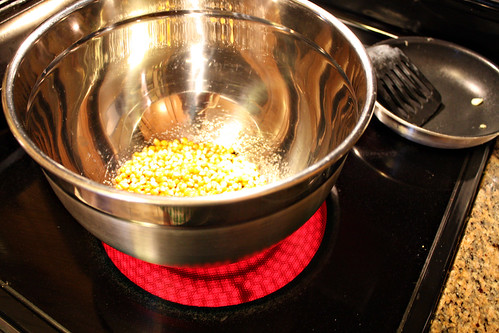
Toss to coat the kernels in oil, and quickly cover tightly with aluminum foil.
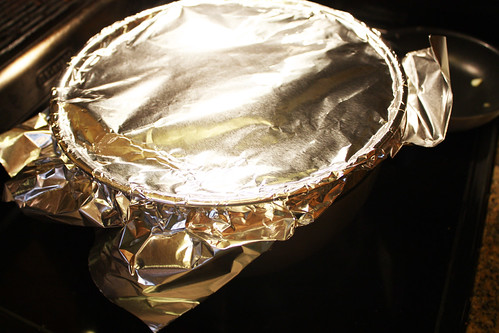
Poke a few holes in the top to allow the steam to vent.

Keep it constantly moving so the kernels don't settle. It will start to pop fairly quickly. Don't stop shaking the bowl until all kernels are popped, approximately 3 minutes. Then remove from heat and set aside.
Now grab the ingredients for the spiced topping.
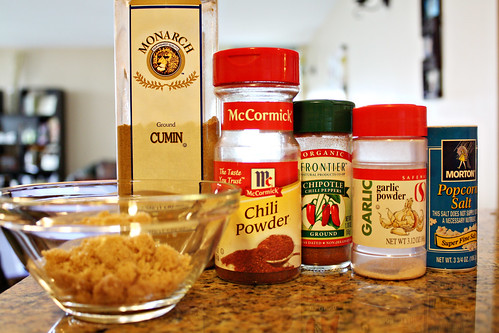
- 2 tablespoons packed light brown sugar
- 1 teaspoon chili powder
- 1 teaspoon ground cumin
- 1/2 teaspoon chipotle powder (the recipe calls for cayenne, but I couldn't find our cayenne so I substituted it with the chipotle powder)
- 1 teaspoon garlic powder
- 2 teaspoons salt
And of course, we can't forget the most important ingredient of all...
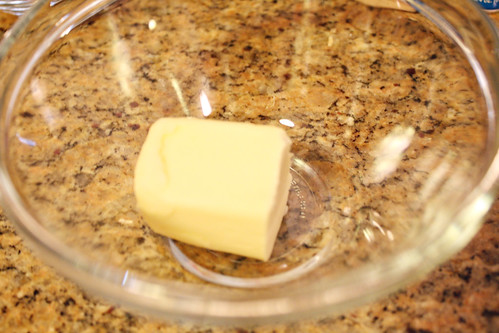
Butter! The recipe calls for 4 tbs, or 1/2 stick.
Melt the butter, and then add the dry ingredients and stir until the sugar has dissolved and the ingredients have melded together.
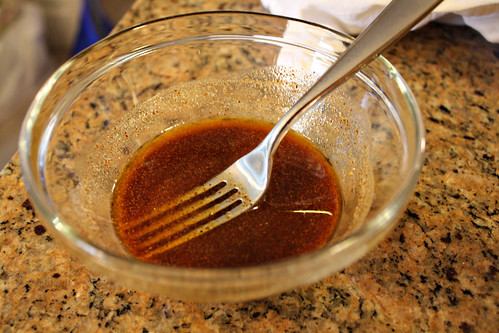
Now go back to your big bowl of popcorn, and very slowly drizzle about 1/4 of the spice mixture on top. Toss the popcorn, and add 1/4 more, then toss, 1/4 more, toss, the last 1/4, and toss again. The goal is even coverage of the popcorn, so however it works for you!

Now dig in! This is an awesome salty-savory-sweet popcorn, and it goes great with a Corona on a lazy Saturday afternoon! Enjoy!
Start by popping 1/2 cup popcorn in the way that you like. We sometimes do air popped popcorn, but for this recipe, we decided to use Alton Brown's Perfect Popcornpreparation method.
We used 1/2 cup popcorn with 2 tbs peanut oil.

Toss to coat the kernels in oil, and quickly cover tightly with aluminum foil.

Poke a few holes in the top to allow the steam to vent.

Keep it constantly moving so the kernels don't settle. It will start to pop fairly quickly. Don't stop shaking the bowl until all kernels are popped, approximately 3 minutes. Then remove from heat and set aside.
Now grab the ingredients for the spiced topping.

- 2 tablespoons packed light brown sugar
- 1 teaspoon chili powder
- 1 teaspoon ground cumin
- 1/2 teaspoon chipotle powder (the recipe calls for cayenne, but I couldn't find our cayenne so I substituted it with the chipotle powder)
- 1 teaspoon garlic powder
- 2 teaspoons salt
And of course, we can't forget the most important ingredient of all...

Butter! The recipe calls for 4 tbs, or 1/2 stick.
Melt the butter, and then add the dry ingredients and stir until the sugar has dissolved and the ingredients have melded together.

Now go back to your big bowl of popcorn, and very slowly drizzle about 1/4 of the spice mixture on top. Toss the popcorn, and add 1/4 more, then toss, 1/4 more, toss, the last 1/4, and toss again. The goal is even coverage of the popcorn, so however it works for you!

Now dig in! This is an awesome salty-savory-sweet popcorn, and it goes great with a Corona on a lazy Saturday afternoon! Enjoy!
Labels:
gift,
guest posts,
snack
Saturday, June 12, 2010
A New From of Discipline
Have YOU seen THESE?
These things are called Silly Bands. They are little plastic bracelets in various shapes; zoo animals, rock band, dinosaurs, etc. Lots of different shapes and lots of different colors, so attractive to little eyes. Not very attractive to mommy's eyes. At $5.99 for 24 for of them, they get not much more than an eye roll from me.
BUT, the boys are fascinated with them and I am using it to my advantage. Notice how my son poses when I tell him I want to take a picture of the bands. Are those the CUTEST guns you've ever seen?
So here we are at dinner, with the new bands and after a very busy day of packing, the boys are acting up just a bit. I'm tired! I'm tired of packing and I'm tired of asking the boys to stop goofing off and nagging them.
Then it hits me. I tell them that every time I have to nag re-ask them to do something, I will take one of their new bands. Instant silence.
I think I've got 'em.
I tell them they can earn them back by being good, but that this is how it's going to work for now. The older one says "This is not a good plan".
So far, after approximately 2 1/2 hours of being in effect, 1 band has been lost and re-earned. In fact, just a minute ago, I reminded them it was time to go to bed after letting them talk for awhile. They, of course continued to giggle. I told them they would both lose a band if they continued and instantly,
NO MORE NOISE.
Well, let me tell you that I am one happy mommy today, maybe even tomorrow. We will have to see how long this one works.
Labels:
discipline,
motherhood,
silly bands
Thursday, June 10, 2010
Buffet Place Setting
Original article from Martha Stewart.com
I saw these placemat settings for a party and thought they were sooo cute. I have to try this.
Bundle place mat, napkin, and utensils in one convenient roll. Begin with a reed mat and 18 inches of 3/4-inch-wide grosgrain ribbon. Thread ribbon from below, between first and second reeds from right (leaving 6-inch overhang). Thread down a few reeds away. Bring up about 1 1/4 inches from right edge. Loop knife handle; pass through mat. Do the same over fork and napkin. Roll up mat from left. Tie ribbon bow around roll, and trim.
Labels:
entertaining,
table decor
It's a Colorful Life Challenge- Black
This week's color is BLACK. These are 4 different pictures of a Lunar Eclipse that my husband took and I spliced them together in Photoshop.
Every week, I will present a new color in my blog and it will be your job to contribute a photo of that color. I will collect all the photos and put them together in a collage. And at the end of the summer, we will have a very colorful piece of art! At the end of the challenge,
I will also pick 1 participant to win a print of the art piece, mounted on 1 inch thick wood frame.
This challenge is hosted by Creative Flair. Be sure to follow to get the update as we go through the colors this summer.
So, just send on over any photo with the major color in the photo being black and I will show off a few here and on my Facebook page every week, So, get your cameras out and send over those photos. You can find my Facebook page at: http://www.facebook.com/creativeflairart
Labels:
Black,
It's a colorful life,
moon,
photo
Wednesday, June 9, 2010
Post - It Thought #2- Haiku
Labels:
haiku,
Post- It thought
Wordless Wednesday- Sunning Turkey Vulture
Labels:
Baja,
sunlight,
vulture,
Wordless Wednesday
Subscribe to:
Posts (Atom)


.jpg)


